FREE 2-DAY SHIPPING
ALL DOMESTIC ORDERS
Back to Top
Learn More From Marine Tech

FREE 2-DAY SHIPPING
ALL DOMESTIC ORDERS
Boating equipment that has sat out in the elements for any amount of time eventually loses some of its flexibility and give. While this is to be expected, it’s still incredibly frustrating to realize that a component of your motor or steering system has seized up and won’t move. Torquing and wrenching on a bracket that’s seized up is likely to cause unwanted damage — either to your equipment or to yourself.
To help you safely and efficiently remove a Seastar bracket that’s seized up, we’ve created a step-by-step guide for you to follow.
![]()
You want to start any big job like this with safety in mind. Having the correct equipment and apparel for the job is very important.
![]()
When you come across a frozen or seized-up bracket, the first thought that may come to mind is, “How can I avoid wasting time getting it loosened up?” Or, “How can I do this job without breaking something expensive?”
You may be inclined to grab the closest hammer or dead blow and start going at it. This would be a big mistake! Seastar brackets are very expensive, and you don’t want to damage yours.
Here at Marine Tech, we have developed the ideal tool to ease the pain of this frustrating job. Our Seastar bracket puller is designed with just this situation in mind. It makes removing a seized up Seastar or Uflex support bracket a breeze.
There’s no need to pay expensive repair bills or waste time hauling your boat to a mechanic or dealer. Our bracket puller allows you to do the job yourself easily and safely in the comfort of your own shop.
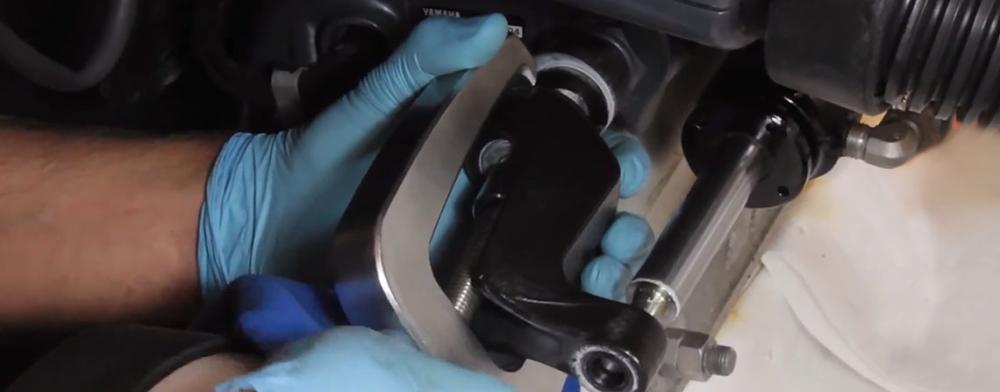
To start with, take a good look at your puller. Notice that it fits over the bracket itself, which has a middle cuff that locks onto the main bolt. Typically your space is rather confined during these types of jobs, so take your time and go at it slowly to avoid damage.
Gently thread the bolt into the cuff and make sure it’s on all the way. If the main bolt is rubbing against or is very close to the transom, take a small piece of cloth and wedge it between the bolt and transom to avoid scratches and damage to the gel coat.
When you’re sure the puller is fully screwed onto the bracket, use a ratchet to slowly turn the puller and back out the bracket. A few turns should break it loose. Then, it’s just a matter of continuing with your ratchet until the bracket is loose enough to remove by hand.
Note that the Marine Tech bracket puller is specifically designed to work in a slow and steady manner so that there is no damage to your equipment. Once the bracket is loose enough, remove the puller and pull the bracket off.
How easy was that? You just saved yourself a lot of time and money by doing this job yourself!
We hope you found our video and instructions helpful. We love designing tools and techniques to enhance your boating experience. Now that you know how to remove a frozen Seastar bracket safely and quickly, you can handle the issue yourself without any unnecessary trips to the shop.
